Joy of Wrapping


I thought it would be fun to “wrap up” this week of hearts with some more hearts.

Last month I enjoyed the simple pleasure of wrapping my giveaway items before sending them on their way.  Is it just me or do you love wrapping too?

As part of wrapping you get to cut and sew…

paste and tie little things onto little boxes…

…all “with heart.”

Doing these small artful things fills my heart with joy.

To see the rest of the piece pictured above, please visit Jenny.  Friends + hearts = joy.  I love this equation.


Christmas Presence


Hi everyone…I hope all has been well.  And I hope that your holiday plans have been going along smoothly.  I imagine many of you have been busy-busy buying and cooking, wrapping and decorating, and making trips to the post office and such.  Are you all caught up…and are you ready to sit back and enjoy?  I hope you are!

If so, and you’re craving a creative outlet, here’s a little something that I made using a cheerful, red birdie stamp as the focal point.  Many of you have probably been receiving lots of Christmas cards in the mail and maybe you’ve been saving the stamps like I have.  And perhaps you also save mini jam jars.  I used both of these items to make the following.

DSC00681

DSC00690

I positioned the feather to reach towards the light, which is life…which is hope.

DSC00685

For weeks now this tune has been playing in my ear…and I hear it loud and clear.  Sometimes our subconscious whispers wise and encouraging words.

DSC00681-001

This Christmas and thereafter, may your peaceful presence be the loving light that warms the hearts in all.


Paper Hearts Love…


This past Christmas my beautiful niece Stephanie gave me presents wrapped in brown polka-dotted paper.  She and I have very similar tastes…we often reach for the simple.  Anyway, I loved the wrapping so much that I saved some.  And it’s a good thing too since it’s come in handy for Valentines Day.

Here’s a look at a heart-shaped bag that I made, which should be perfect for filling with sweets.

DSC01089

In my usual fashion I used my favorite number as the focal point.

DSC01092

And here’s a look at some of the details which include some inches of creamy, latte colored ribbon (also saved from Stephanie’s present wrapping) as well as a pearl dangle and wire handle (24 gauge).

DSC01091

Below is another hanging heart bag.  This one is embellished with just 2 buttons and a string handle instead of wire.  I have a whole box full of string, also saved from previous presents (save and reuse is a constant for me).

DSC01109

This next heart that I made is also pocket style, but I made it a little different by sewing one of the heart’s curves closed while leaving the other curve open.  And I omitted adding a handle so this heart can be used more like an envelope.

DSC01115

Then I added a rub-on letter “B” along with two buttons and a strip of scrap fabric placed near the letter to create a strong but simple focal point.

DSC01118

The top opening is perfect for stuffing rolled-up love notes inside.

DSC01098

And speaking of love notes, here’s one that I created using the same paper.  I purposefully crumpled up the paper to create texture before adding the embellishments.

DSC01074-001

DSC01081

Here’s a close-up of one side.

DSC01077

I used a regular pencil to write a message of love.  Putting pencil to paper is so old school and there’s something very warming about it.

DSC01080

May the warmth and glow of love, flow on and on…and on and out…always and beyond.


Two More Trees


I’ve been watching the trees and admiring their bare and beautiful branches…their ever-amazing and unpredictable forms have inspired me to create two more little somethings for the holiday season.   

This no-sew project is made from a favorite childhood material, the good-ole pipe cleaner.  Twisting twinkling pipe cleaners into a tiny tree…oh what fun! 

DSC09314

 To create this project you’ll need about 1 dozen pipe cleaners.  Begin making the tree by creating the center trunk (twist 2 pipe cleaners around eachother), then bend it in half and twist it together again, forming a 4 pipe cleaner thickness.  For the branches, bend 1 pipe cleaner in half and twist this together, forming a double-thickness.  Then attach this branch to the the trunk by wrapping the twisted pipe cleaner at the center, around the trunk at least twice to keep the branches secure (start attaching the branches from the bottom of the trunk.)  Once all the branches are filled in, use scissors to trim the ends of the pipe cleaners to form an evergreen tree shape.  To tone down the bright silver color of the pipe cleaners I chose to apply Staz-On ink pad (Timber Brown) with a stiff stencil brush to the tree trunk and branches.

Here’s a close-up view of the spool base.

DSC09319

To create the base, use a glue stick to adhere sheet music to the top of an old wooden spool.  Then wrap a few inches of tea-dyed ribbon around the spool, and use a staight pin to keep the end of the ribbon secure (first add a vintage bead and button to the pin before piercing through the ribbon.)  For an aged appearance, apply Distress Ink (Tea-dye) with a stiff stencil brush to the spool.  Lastly, use a generous amount of craft glue to adhere the tree trunk through the center of the spool. 

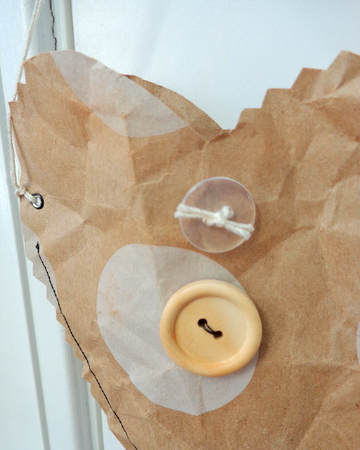
Below is another project that I created using a few spare parts including one of my favorite materials, a paper grocery bag.   Isn’t it fantastic that with just one bag you can create dozens of these little trees?  I think I might use these little trees as gift tags, which later could be used as a bookmark (after removing the beaded dangles so it fits between the pages,) or you could simply hang them up just about anywhere, including on a Christmas tree. 

DSC09330

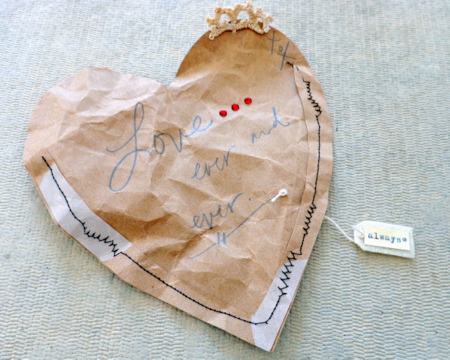
 To make this tree, begin by cutting a tree shape from a recycled grocery bag (2 pieces – 1 front, 1 back.)  Then use a sewing machine to stitch the tree trunk and branches (I used two thread colors for some dimension) to the front piece.  Next use an embroidery needle and thread to attach beaded dangles to the bottom of the tree trunk.

DSC09331

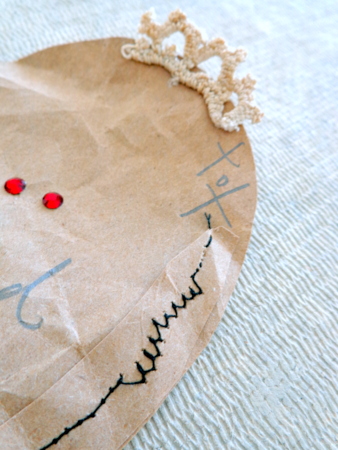
Then layer some fabric scraps and machine sew together to form the base of the tree.  To attach this base to the tree, place the front (embellished) piece on top of the bottom piece and insert the base in between (about 1/3″ ) and machine sew the tree pieces together around the edges.  Then use pinking shears to randomly add interest to the tree edges, and lightly apply oil pastels (black, brown, silver) around the edges and rub in the colors with your finger tips.

 DSC09345

 Lastly, use a hole punch to make a small hole at the top of the tree, and use this hole to attach a string for hanging purposes. 

DSC09336

Making tree inspired items is mostly out of my system for now, and I’m ready to move on to creating something else…possibly mini-stockings or mittens, or something having to do with birds…I miss my birds.